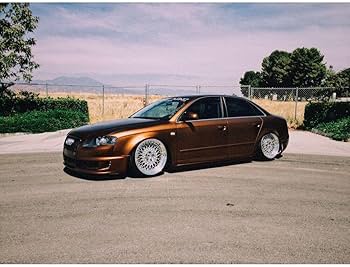
Car customization has become a popular way for enthusiasts to express their individuality and style. Among the many options available, vinyl wraps are a standout choice for transforming your vehicle's appearance without committing to a permanent paint job. One of the most striking options is a bronze vinyl wrap, which adds a luxurious and modern touch to any car. If you're ready to take your car's aesthetics to the next level, here's how to apply a Bronze Vinyl Wraps like a pro.
Step 1: Gather Your Tools and Materials
Before you begin, ensure you have all the necessary tools and materials. You'll need:
- Bronze vinyl wrap of your choice
- A heat gun
- Squeegees with felt edges
- A sharp utility knife
- Isopropyl alcohol and microfiber cloths
- Masking tape
- Gloves (optional, but recommended for grip and cleanliness)
Step 2: Prepare Your Vehicle
Preparation is key to achieving a flawless finish. Start by thoroughly washing your car to remove any dirt, grease, or debris. Once clean, wipe the surface with isopropyl alcohol to ensure it's free of any residue that could interfere with the adhesive. Pay extra attention to edges, crevices, and recessed areas.
If your car has any imperfections, such as scratches or dents, consider fixing them beforehand. Vinyl wraps will conform to the surface underneath, so any flaws may become more noticeable once the wrap is applied.
Step 3: Plan and Measure
Unroll the vinyl wrap and measure each section of your car to ensure proper coverage. Cut the vinyl into manageable pieces, leaving a few extra inches on all sides for adjustments. Use masking tape to outline the areas you'll be wrapping, which will help you stay organized and avoid mistakes.
Step 4: Apply the Vinyl Wrap
Begin with smaller sections, such as the hood or doors, before moving on to larger or more complex areas. Peel off the backing of the vinyl and gently position it over the surface. Use your squeegee to smooth out air bubbles and wrinkles, starting from the center and working outward.
For curved or uneven surfaces, use a heat gun to make the vinyl more pliable. Be careful not to overheat it, as this can cause damage. Stretch the vinyl gently and press it into place with your squeegee.
Step 5: Trim and Finish
Once the vinyl is securely in place, use a utility knife to trim any excess material along the edges. Be precise and take your time to avoid cutting into the car's paint. After trimming, go over the edges with your heat gun and squeegee to ensure they’re sealed properly.(Matte Vinyl Wraps)
Step 6: Inspect and Finalize
Inspect your work for any remaining air bubbles or imperfections. Small bubbles can often be popped with a pin and smoothed out with a squeegee. Once satisfied, let the vinyl set for 24-48 hours before washing or exposing it to harsh conditions.
Conclusion
Applying a bronze vinyl wrap is an excellent way to give your car a fresh, eye-catching look. While it requires patience and attention to detail, following these steps will help you achieve professional results. Whether you're enhancing your car for personal enjoyment or preparing it for a show, a well-applied vinyl wrap will undoubtedly turn heads wherever you go.